How to Create a System Restore Point in Windows (Easy & Safe)
Before you install new software, update drivers, or change system settings, it’s smart to create a system restore point in Windows first. It takes about a minute, and if something goes wrong, it can save you hours of frustration later.
Most Windows problems don’t start with a crash. They start quietly. You install something. You tweak a setting. You follow advice that sounded confident. Then your system feels off and you’re trying to remember what it was like when everything worked.
That’s exactly what a system restore point is for.
What a System Restore Point Is (And What It Isn’t)
A system restore point is a snapshot of your Windows system state at a specific moment in time.
It protects:
- Windows system files
- Installed programs
- Drivers
- Registry settings
It does not protect:
- Documents
- Photos or videos
- Downloads or personal files
That distinction matters.
System Restore is not a full backup. It does not roll back your entire computer. It only rolls back Windows itself. Think of it as an undo button for system-level changes.
Windows sometimes creates restore points automatically before major updates, but I don’t rely on that. If I’m about to make a change that could break something, I create one manually first.
When You Should Create a Restore Point
If you ever think, “This might cause problems,” that’s your cue.
Create a system restore point in Windows before:
- Installing new software or utilities
- Updating or changing device drivers
- Editing the Windows registry
- Applying major Windows updates
- Trying system tweaks you are not fully confident about
Creating a restore point takes less time than fixing a broken system later.
How to Create a System Restore Point in Windows
This method works across Windows versions. Menus change, but search stays consistent.
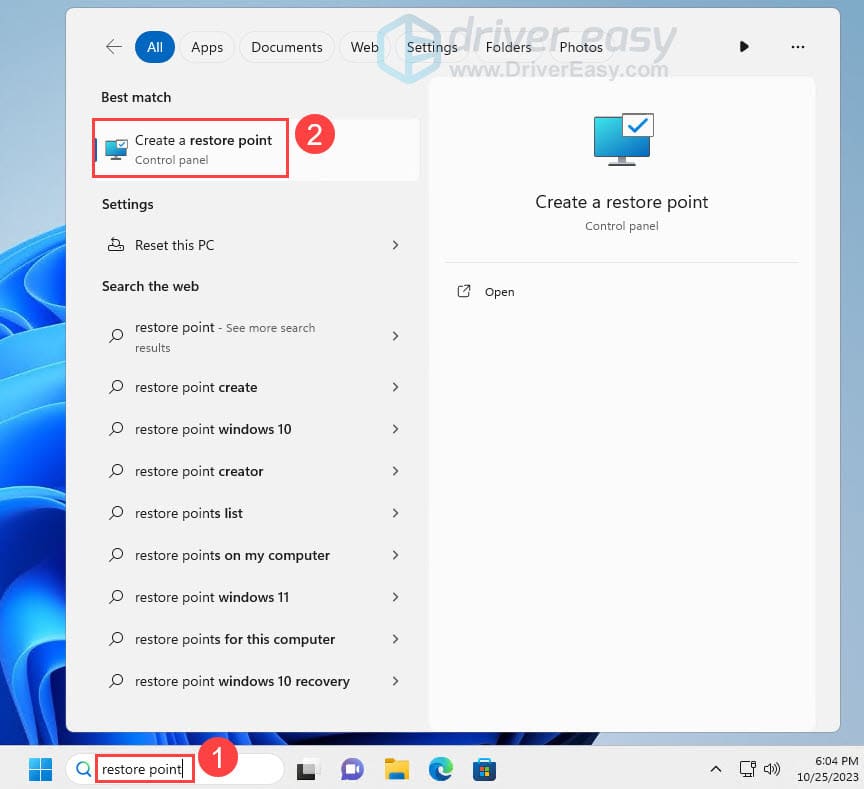
Step 1: Open System Protection Settings
- Click the Start menu
- Type Create a restore point
- Click the result
This opens the System Properties window directly to the System Protection tab.
Step 2: Create a Manual Restore Point
If System Protection is already enabled, you can create a restore point immediately.
- Make sure your main Windows drive, usually C:, is selected
- Click Create
- Enter a clear description
Good examples:
- Before driver update
- Before installing new software
- Clean system state
Windows automatically adds the date and time, so keep the name simple.
Click Create. Most systems finish in under a minute.
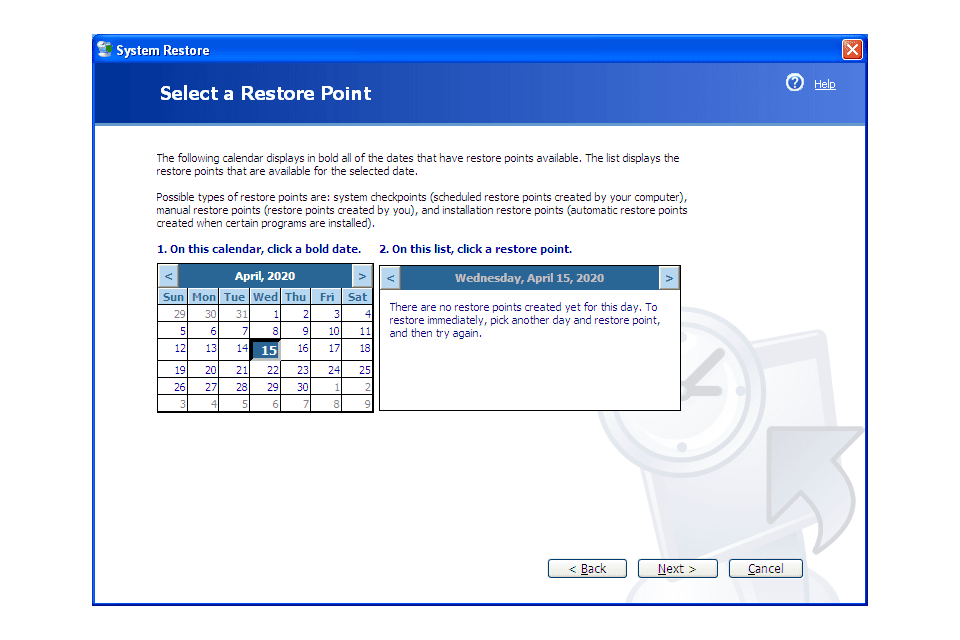
Step 3: Verify the Restore Point Exists
It’s worth checking the first time so you know everything worked.
- Click System Restore
- Click Next
- Confirm your restore point appears in the list
Once you see it, cancel out. You’re done.
How to Use a Restore Point to Fix Windows Problems
If Windows still starts normally:
- Open System Protection
- Click System Restore
- Select a restore point created before the issue
- Optionally scan for affected programs
- Confirm and restart
If Windows will not start:
- Hold Shift and click Restart
- Or boot into recovery mode
- Choose Troubleshoot → Advanced options → System Restore
Restore points do not fix everything, but when they work, they work well.
Important Things to Know About System Restore
A few practical realities:
- System Restore does not replace backups
- Disk cleanup tools can remove restore points
- Older restore points disappear when space fills up
- Some work or school systems disable this feature
Restore points protect system changes only. Always back up personal files separately.
Enable System Protection (If Restore Points Are Not Working)
If you do not see the Create button, or restore points fail to save, System Protection is likely turned off.
Here’s how to enable it.
- Open Create a restore point from the Start menu
- Under Protection Settings, select your main Windows drive, usually C:
- Click Configure
- Choose Turn on system protection
- Set disk space usage
A good rule of thumb:
- 5 to 10 percent of the drive
- Or about 10 to 15 GB on most systems
Windows will automatically delete older restore points when space runs out. That’s normal.
Click Apply, then OK.
Once this is enabled, restore points will work properly.
Frequently Asked Questions
Does creating a system restore point delete my files?
No. Personal files like documents, photos, and videos are not affected.
How often should I create a restore point?
Any time you install software, update drivers, or change system settings.
How long do restore points last?
They remain until Windows needs the space, at which point older ones are deleted automatically.
Can System Restore fix all Windows issues?
No. It helps with system-level problems, not hardware failures or corrupted personal files.
Is System Restore the same as a backup?
No. System Restore protects Windows settings, not your personal data.
The Takeaway
Creating a system restore point in Windows is one of those habits that feels unnecessary right up until it saves you.
What I do is simple. If I’m about to install something, update something, or change something I might regret later, I pause and create a restore point first. It takes a minute. That matters.
Do it before the change, not after the problem.