If you are trying to install FFmpeg on Windows, this guide walks you through the entire setup step by step, from downloading the correct build to verifying that everything works properly. The goal is a clean FFmpeg installation that runs from any folder and does not break the first time you need it.
Before You Install FFmpeg on Windows
This guide is Windows only.
That’s simply what I use and what I know. FFmpeg behaves differently on macOS, and I’m not going to guess my way through Apple-specific instructions. I may update this in the future, but for now, this walkthrough is strictly for Windows.
If you’re on Windows, you’re in the right place.
I HIGHLY suggest always setting up a restore point in windows before changing anything to do with systems.
Prerequisites
Before you start, make sure you have:
- A Windows PC. Windows 10 or Windows 11 both work fine.
- A file archiver like 7-Zip to extract
.7zfiles. - Access to Command Prompt or PowerShell.
- Administrator rights, since you’ll be editing system environment variables.
If you’ve got all of that, you’re good to go.
How to Install FFmpeg on Windows Step by Step
This section covers how to install FFmpeg on Windows from download to verification, without skipping any required steps.
We want an FFmpeg Windows install that:
- Actually works
- Runs from any folder
- Does not break the first time you try to use it
If you skip steps or half-install it, FFmpeg becomes annoying fast. If you do it properly once, you basically forget it exists until you need it. That’s exactly what we want.
Step 1: Download FFmpeg for Windows
First, grab the correct build. This matters more than people think.
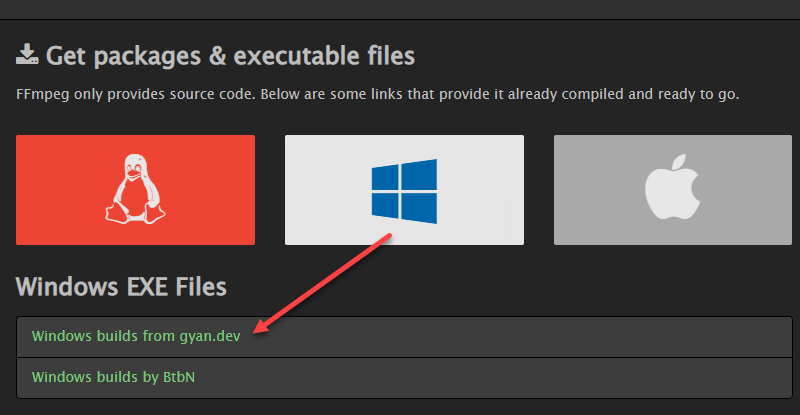
- Go to the official FFmpeg download page:
https://ffmpeg.org/download.html - Under Get packages & executable files, click the Windows icon.
- Click Windows builds from gyan.dev.
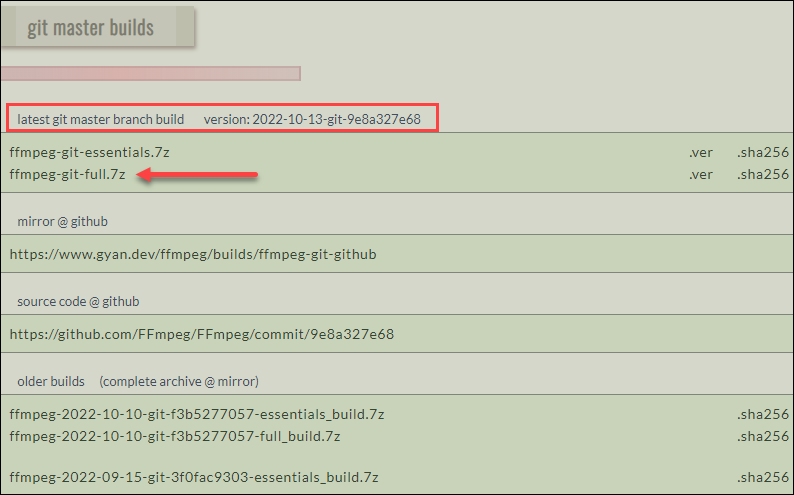
This is the recommended Windows source and it’s reliable. - Under Release builds, download:
- ffmpeg-release-essentials.7z for most users
- ffmpeg-release-full.7z only if you specifically need extra codecs
- Save the file somewhere obvious, like your Downloads folder.
That’s it for this step. Don’t install anything yet.
Step 2: Extract the FFmpeg Files
FFmpeg is distributed as a compressed archive, so you need to extract it first.
If you don’t already have 7-Zip installed, download it from:
https://www.7-zip.org/
Once that’s done:
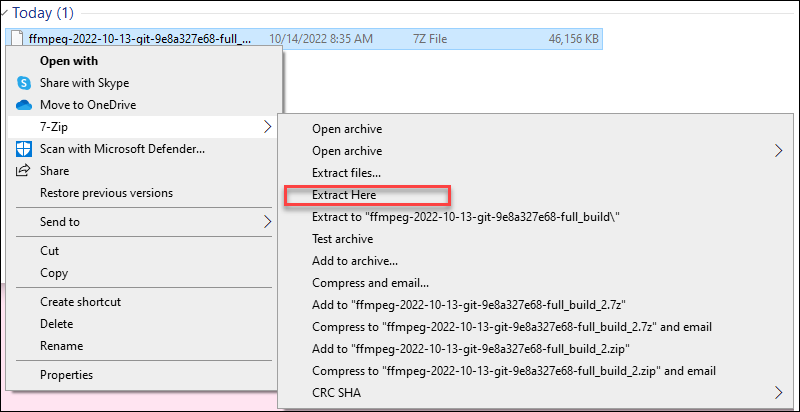
- Right-click the downloaded
.7zfile. - Choose 7-Zip → Extract Here or Extract to “ffmpeg-…”.
- You’ll get a folder with a long name like:
ffmpeg-2025-xx-xx-essentials_build
Rename that folder to FFmpeg.
Move the folder to the root of the C drive ( Technically you CAN move it anywhere but trust me just put it in C.)

Inside C:\FFmpeg, you should see a bin folder. Inside that folder are files like:
ffmpeg.exeffprobe.exe
That’s what we need.
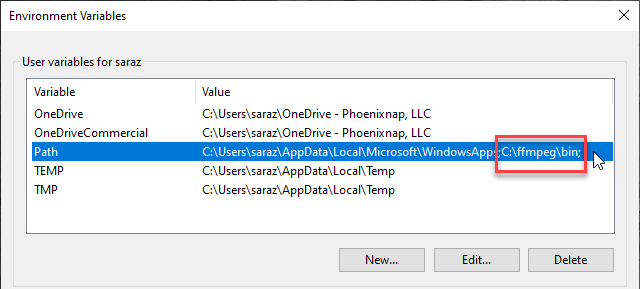
Step 3: Add FFmpeg to Your PATH on Windows
This is the step that makes FFmpeg usable from anywhere on your computer.
Adding FFmpeg to your PATH means you can run it from any Command Prompt window instead of navigating to its folder every time.
Here’s how to do it:
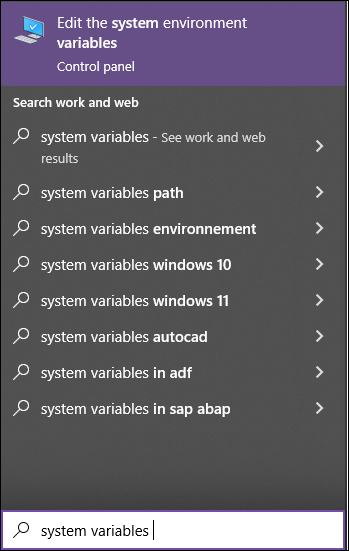
Press Win + S and search for Environment Variables.
Click Edit the system environment variables.
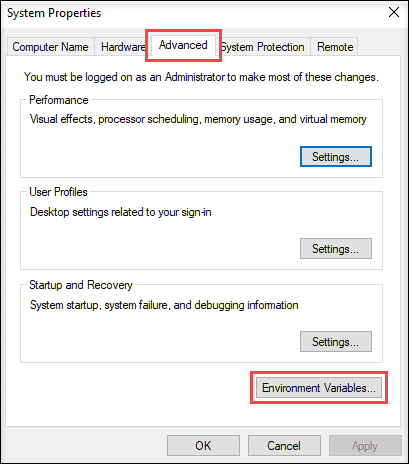
In the System Properties window, click Advanced —> Environment Variables.
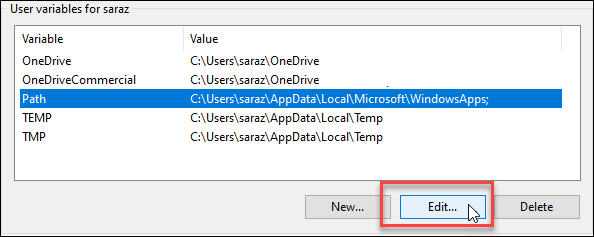
Under System variables, find Path and click Edit.
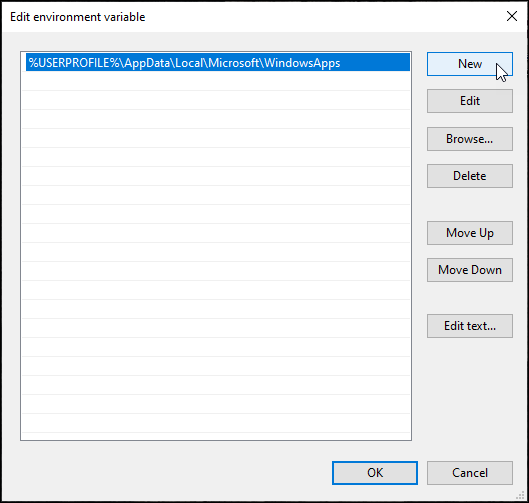
Click New and add: C:\FFmpeg\bin
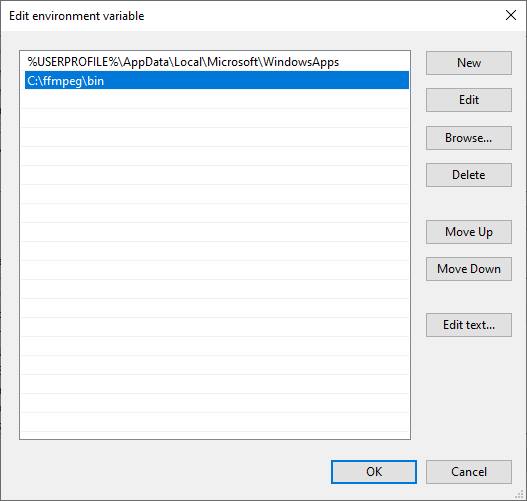
Click OK on all open windows to save.
Windows now knows where FFmpeg lives. The change in the Path variable line confirms the FFmpeg is added to PATH.
Step 4: Verify the FFmpeg Installation
Now we confirm that everything worked.
- Press Win + R, type
cmd, and press Enter. - In Command Prompt, type:
ffmpeg -version
If the FFmpeg Windows install was successful, you’ll see version information and build details printed in the terminal. That’s your confirmation.

ffmpeg is not recognized as an internal or external command
If you see this error, it usually means one of two things:
- The folder is not actually located at
C:\FFmpeg\bin - The PATH entry was added incorrectly or not saved
Fix those, close Command Prompt, reopen it, and try again.
Why This Setup Matters
This is the boring part you only want to do once.
A proper FFmpeg setup on Windows means:
- You can fix broken or rejected uploads without re-editing
- You can batch convert or resize files quickly
- You can automate repetitive media tasks later
For content creators especially, FFmpeg becomes one of those background tools you rely on without thinking about it.
And that’s ideal.
xample Expanded FAQ Section
Is FFmpeg free to use on Windows?
Yes. FFmpeg is free and open-source and can be used for both personal and commercial projects.
Why is FFmpeg not recognized as a command on Windows?
This usually means FFmpeg was not added to the system PATH correctly or the Command Prompt was not reopened after the change.
Does this guide work for Windows 10 and Windows 11?
Yes. The installation steps are the same for both versions.
Do I need FFmpeg if I already use editing software?
Many editors use FFmpeg behind the scenes, but installing it manually gives you direct control when files fail or need fixing.
What should I do after I install FFmpeg on Windows?
Once installed, you can use FFmpeg to convert, fix, or batch-process media files as needed.
Final Takeaway
This guide is just the setup.
Once FFmpeg is installed and working, you’re done here. You don’t need to touch it again unless you change machines.
Consider this your setup step. Commands come later.